
 Image 1 of 5
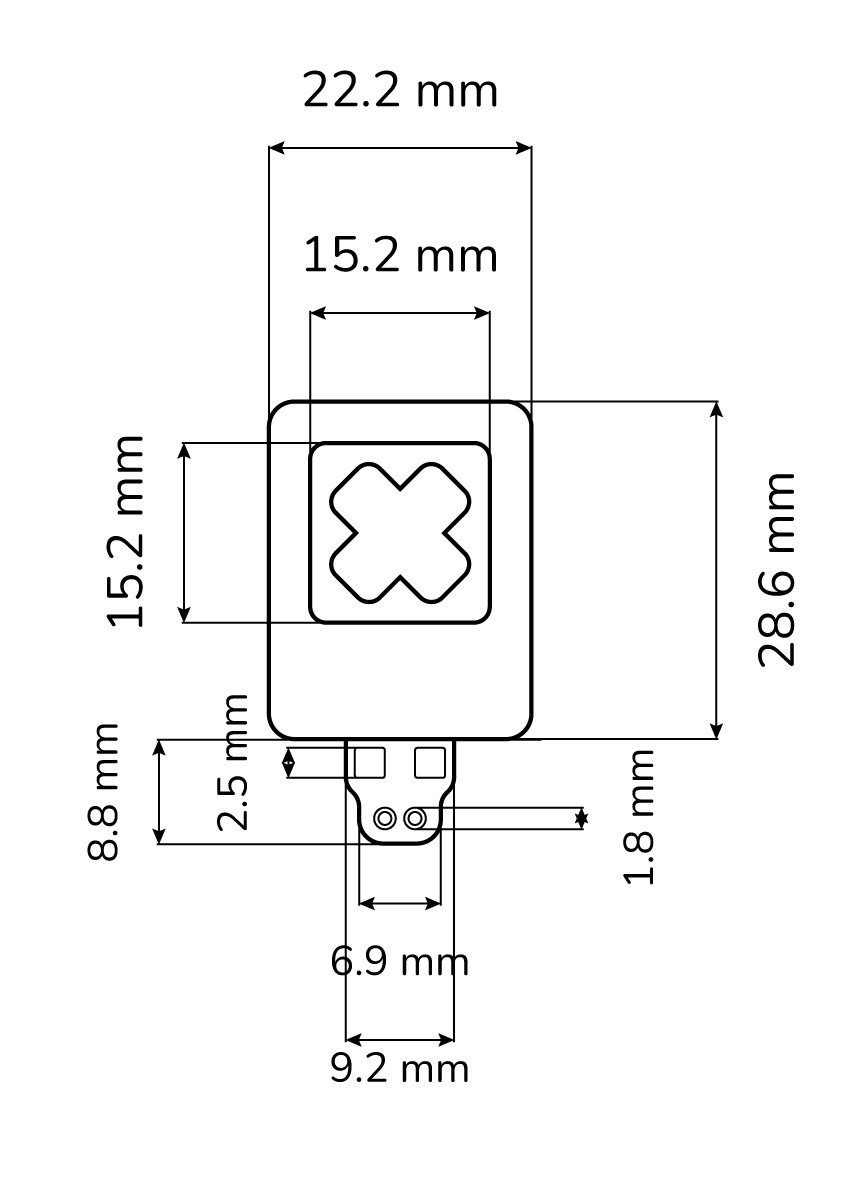 Image 2 of 5
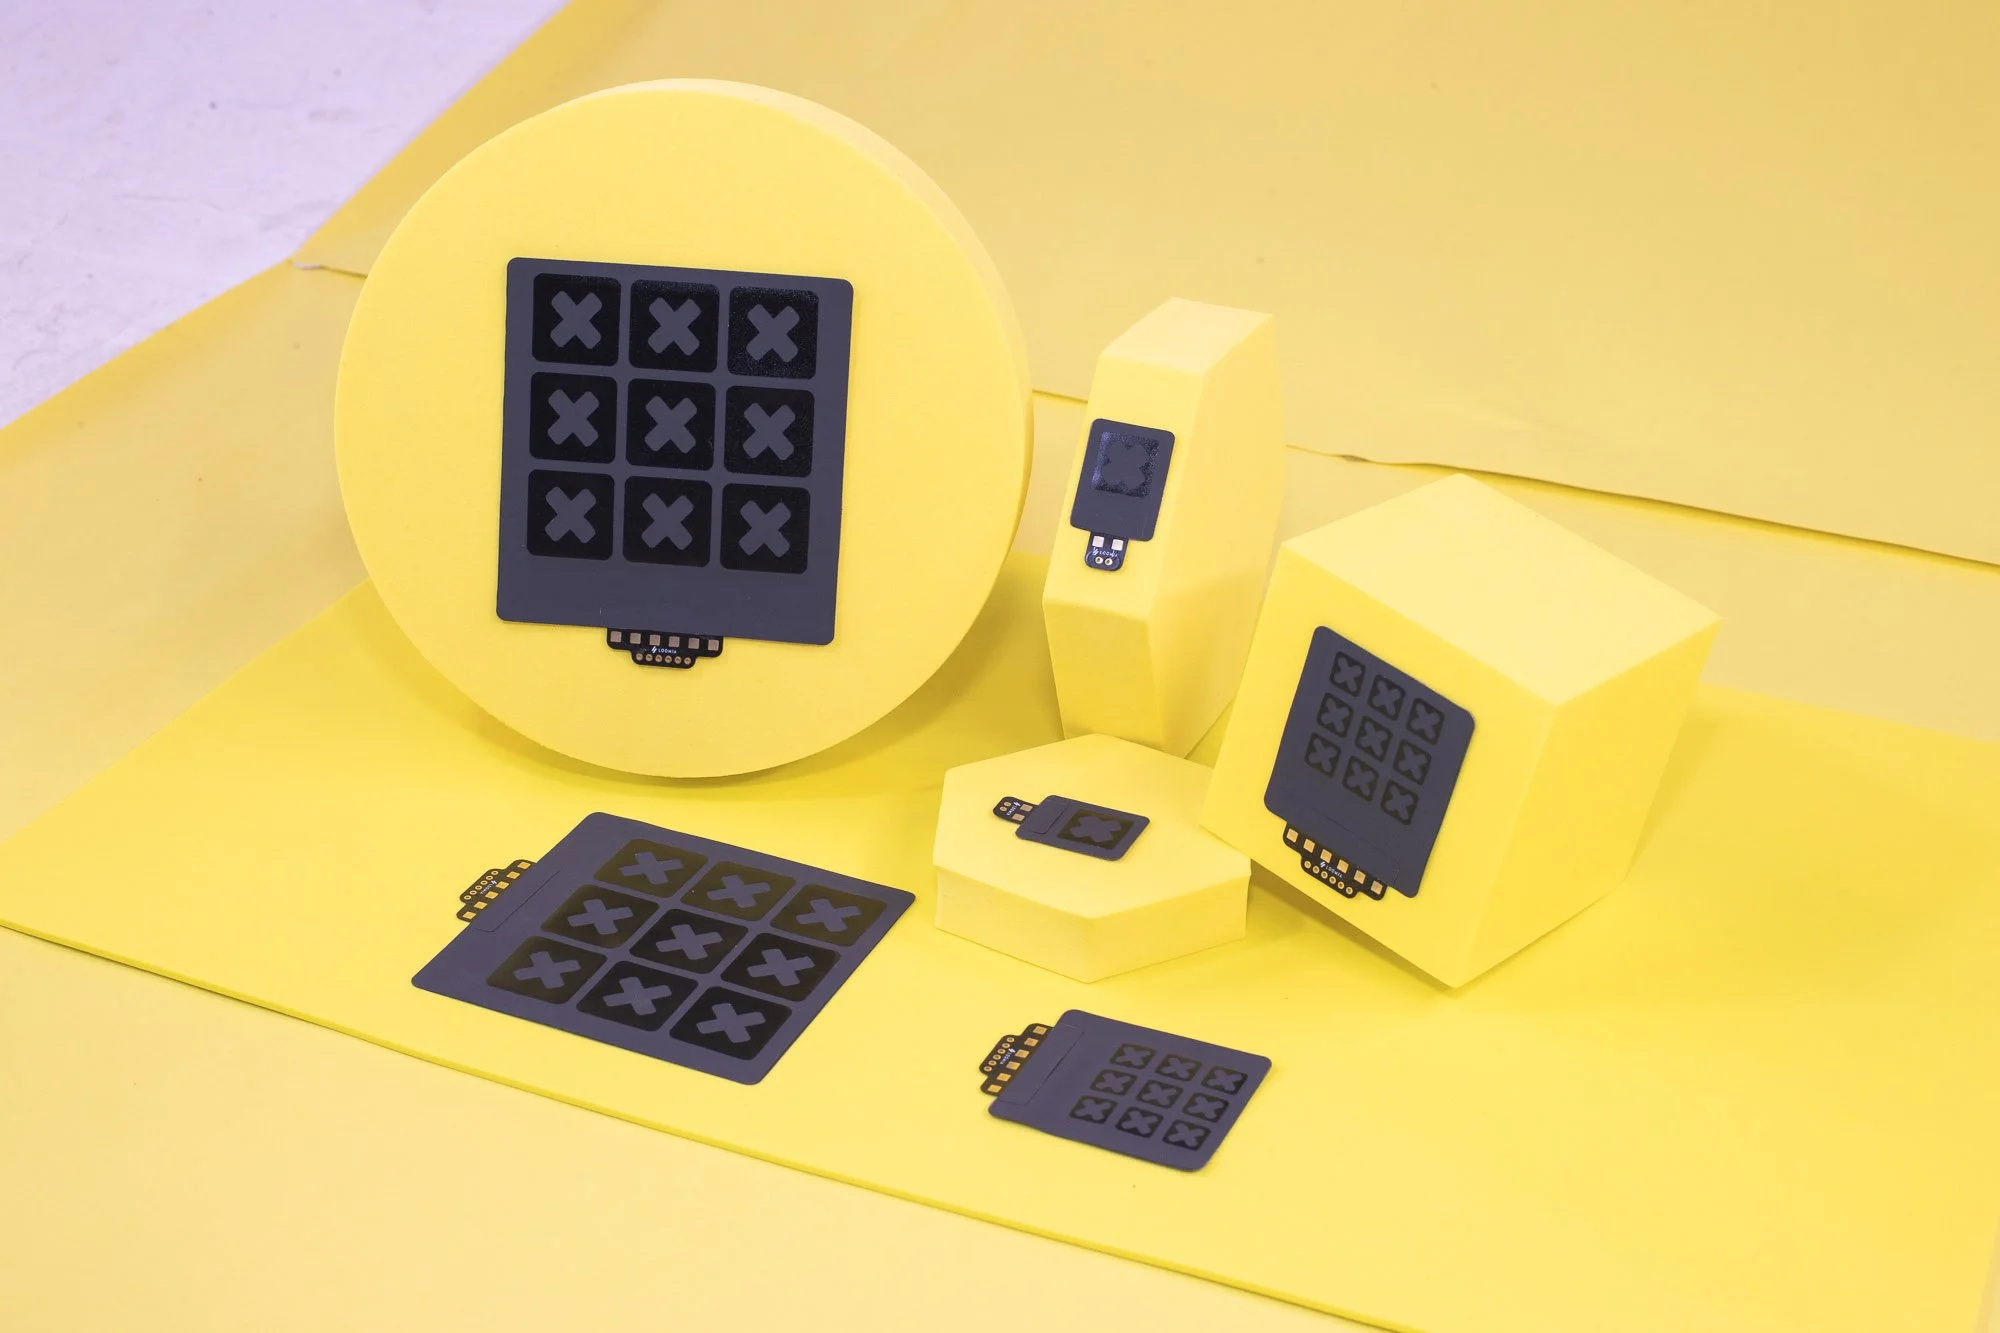 Image 3 of 5
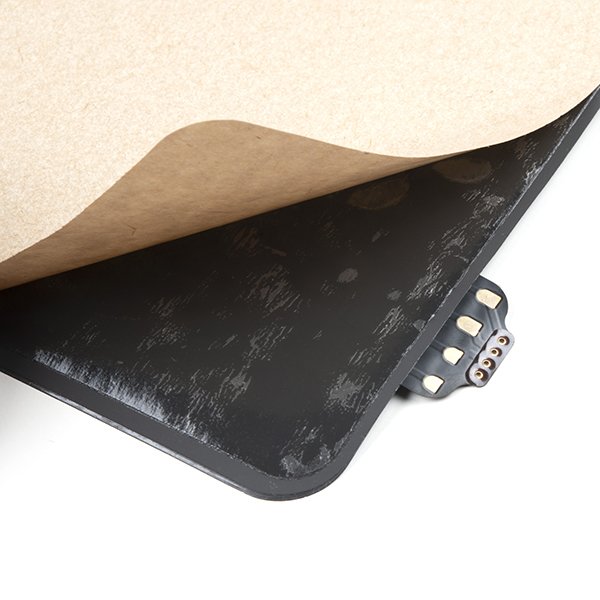 Image 4 of 5
 Image 5 of 5
Loomia Force Sensitive Resistor (FSR) Features Overview
The table below provides data on standard Loomia FSR performance:
Resistive Sensor Specifications
13.3% over 1 hour at 50 N
10,000+ cycles at 50 N
Avg 1% per cycle (10 cycles at 50 N)
Arduino + Python Scripts
8-week lead time required
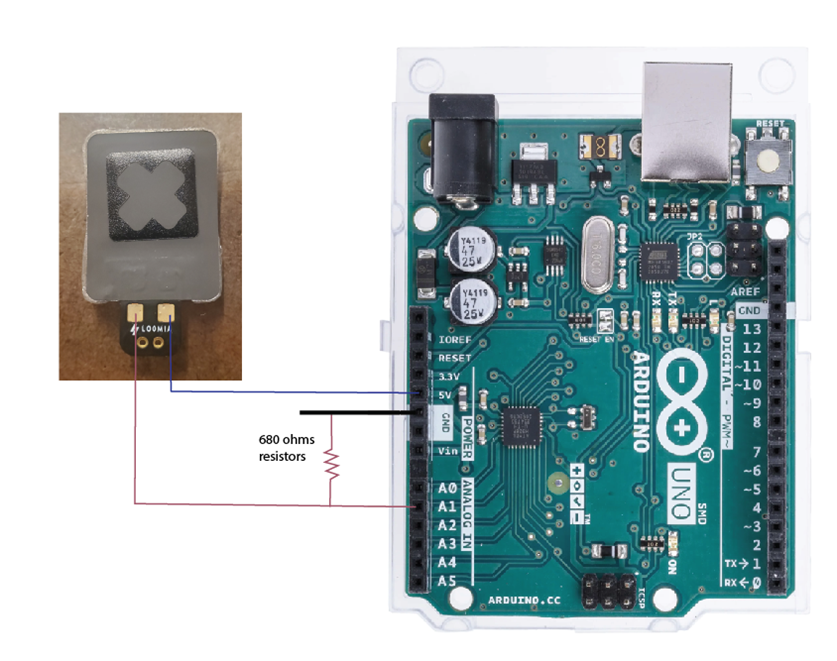
Arduino Pressure Sensor Arduino Script
/* Arduino Script */

int pressurePin = A1;

void setup() {
  Serial.begin(9600);
}

void loop() {

  int pressure = analogRead(pressurePin);
  Serial.println(pressure);
  delay(50);
}
Single Pressure Sensor Pinout
Integration and Interconnect
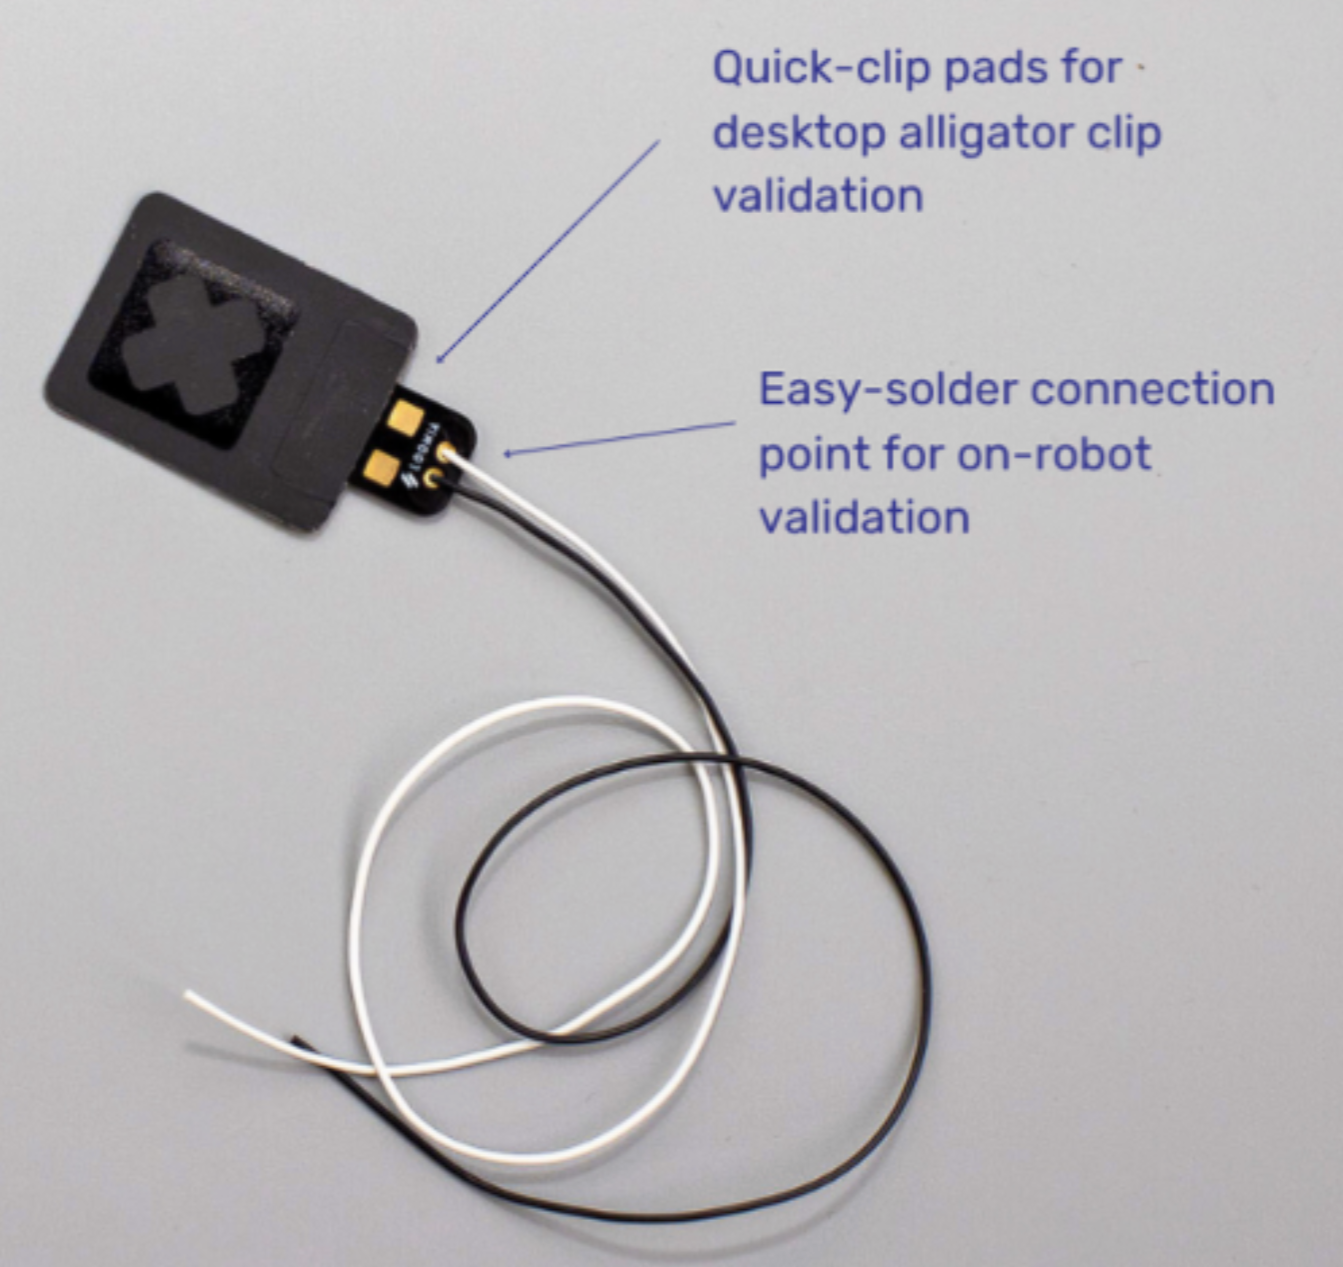
Loomia Interconnect Use Instructions:
Loomia custom interconnects are designed for easy soldering or alligator clipping in prototyping. Using the interconnect is straightforward:
Use the large pads for alligator clipping or extra easy soldering. Only solder to large pads once to avoid delamination
Place wires and solder through the through holes for a cleaner wire connection. These holes can also be used with headers for direct placement into a breadboard. We also only recommend soldering through these holes once.
Note: Interconnects are reinforced with resin on the back of the through-hole connection points. Therefore, soldering from the top may be necessary for a connection.
Integration Instructions:
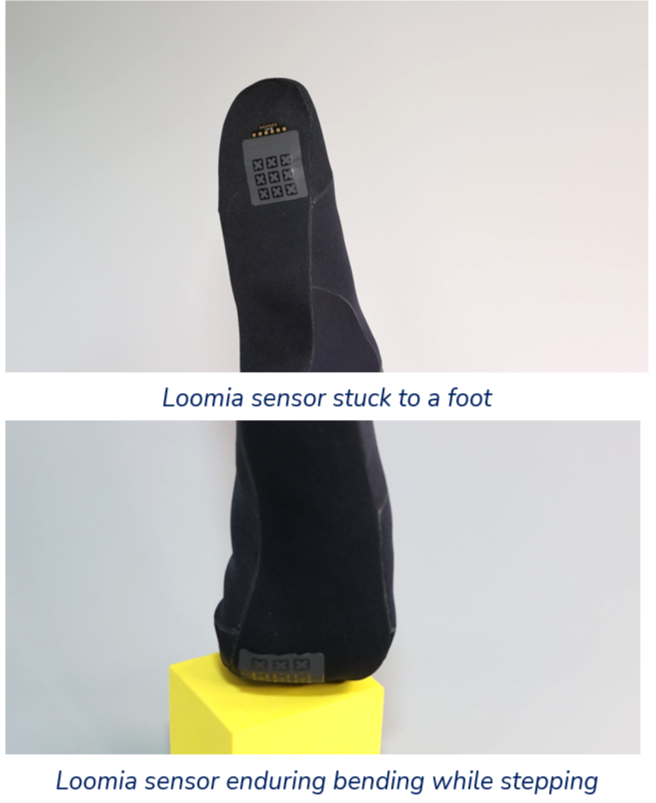
Our components are designed for easy integration onto surfaces. To attach our LEL to a surface (textile or plastic) Follow the instructions below:
Using the peel-and-stick backing, gently peel off the brown paper.
With adhesive exposed, apply the sticky component to your surface and ensure there are no bubbles.
Press down firmly
Do not lift or re-apply
Single Flexible FSR - FAQ
-
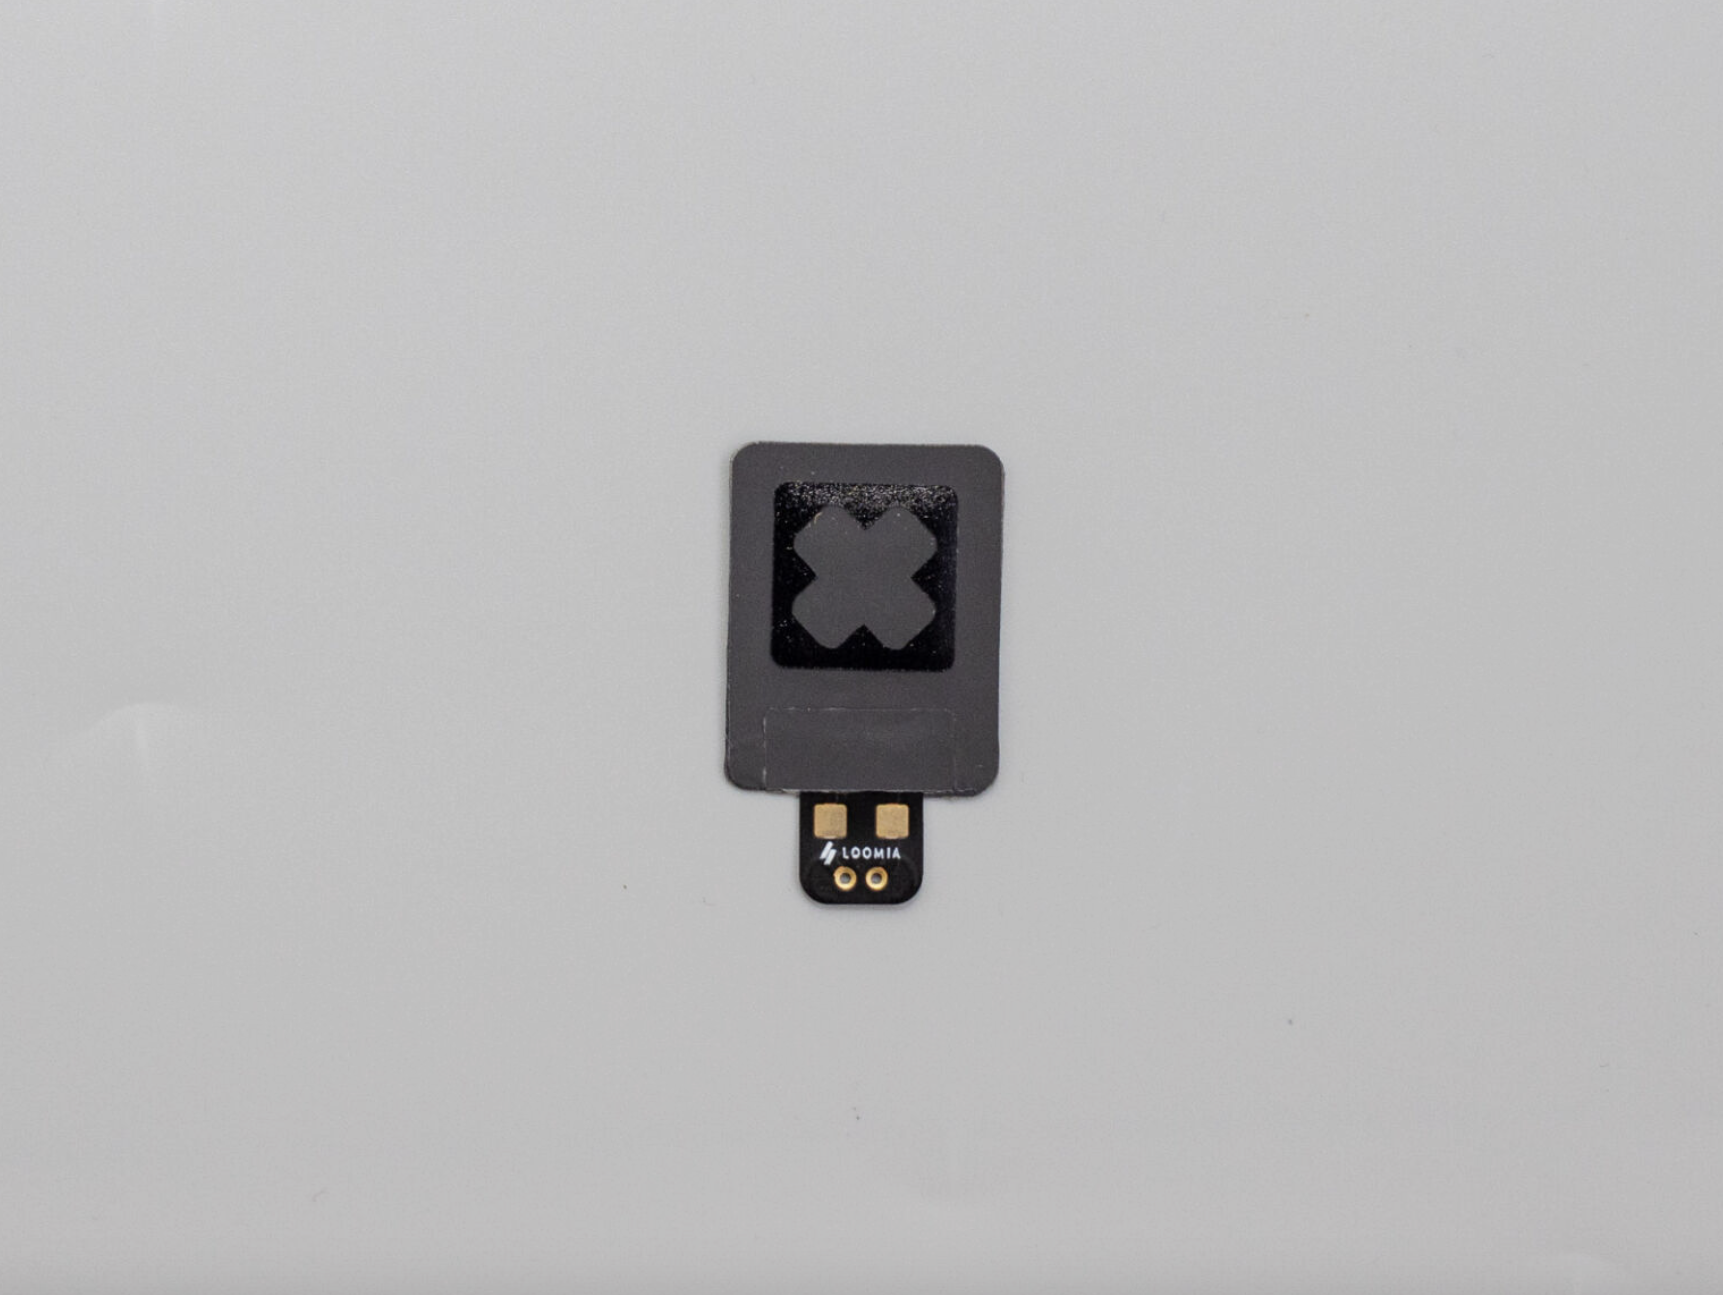
The Single Flexible FSR is a compact force-sensitive resistor designed to measure applied pressure with an analog output. Its small form factor makes it suitable for applications where space is limited.
-
The sensor measures approximately 22.2 mm × 28.6 mm, making it ideal for compact force-sensing applications.
-
The sensor works by decreasing electrical resistance as pressure increases. This allows it to produce an analog signal that reflects the level of applied force.
-
The sensor can be used on flat or gently curved surfaces and is designed to integrate easily into flexible or soft-surface applications.
-
The sensor supports PSA backing for quick peel-and-stick installation on surfaces such as textiles or plastics. It also includes connection options suitable for soldering or clip-based prototyping.
-
Yes. Sample scripts, Arduino pinout documentation, and integration guidance are available to help evaluate sensor performance and support prototyping.