
HOW TO EVALUATE LOOMIA FORCE SENSITIVE RESISTORS (FSRs)
Reliable testing methods for accurate pressure sensor evaluation.
Learn how to test Loomia force-sensitive resistors using Arduino setups, laboratory equipment, and controlled testing techniques for consistent results.
User Validation Instructions
The instructions below will help you set up and validate your sensors.
Materials Required:
Computer with Arduino Installed
Breadboard
Arduino
Loomia Pressure Matrix
Alligator clips to breadboard components
680 ohm resistors
Breadboarding jumper wires
| Step | Description |
|---|---|
| 1 |
Use example schematics to set up a sensor with pull-down resistors. You can use alligator clips
or soldering to connect to an Arduino.


|
| 2 | Plug in the Arduino and open our code samples from the relevant product page (loomia.com/samples). |
| 3 |
Click “Serial Monitor” and make sure every quadrant is in the correct order by pressing a finger on each quadrant.
R1C1 = Quadrant 1 R1C2 = Quadrant 2 R1C3 = Quadrant 3 R2C1 = Quadrant 4 R2C2 = Quadrant 5 R2C3 = Quadrant 6 R3C1 = Quadrant 7 R3C2 = Quadrant 8 R3C3 = Quadrant 9 
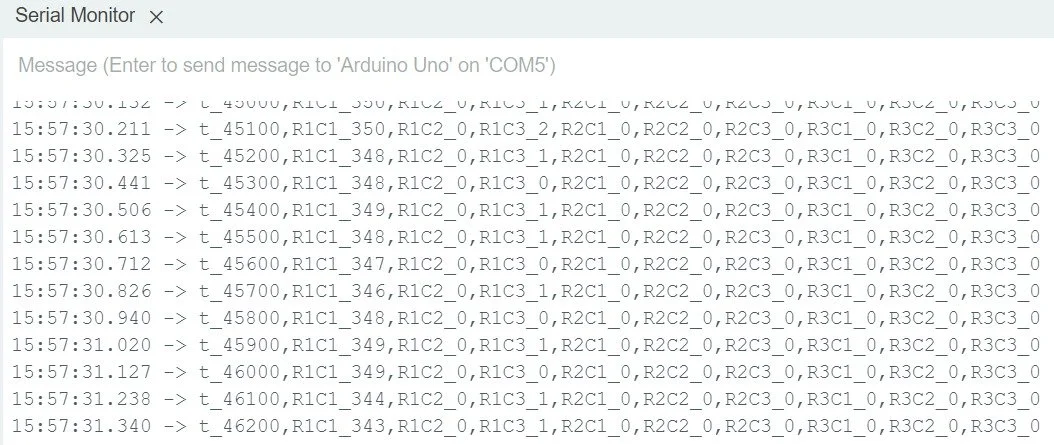
Matrix example quadrant 1 readout — values should increase with force.
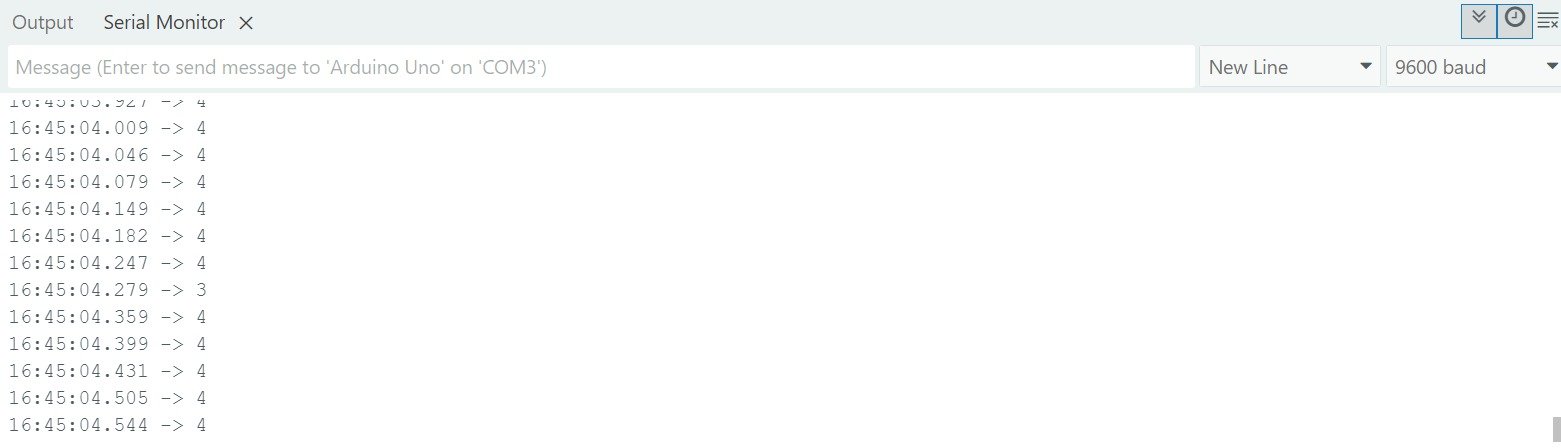
Single FSR serial monitor example
|
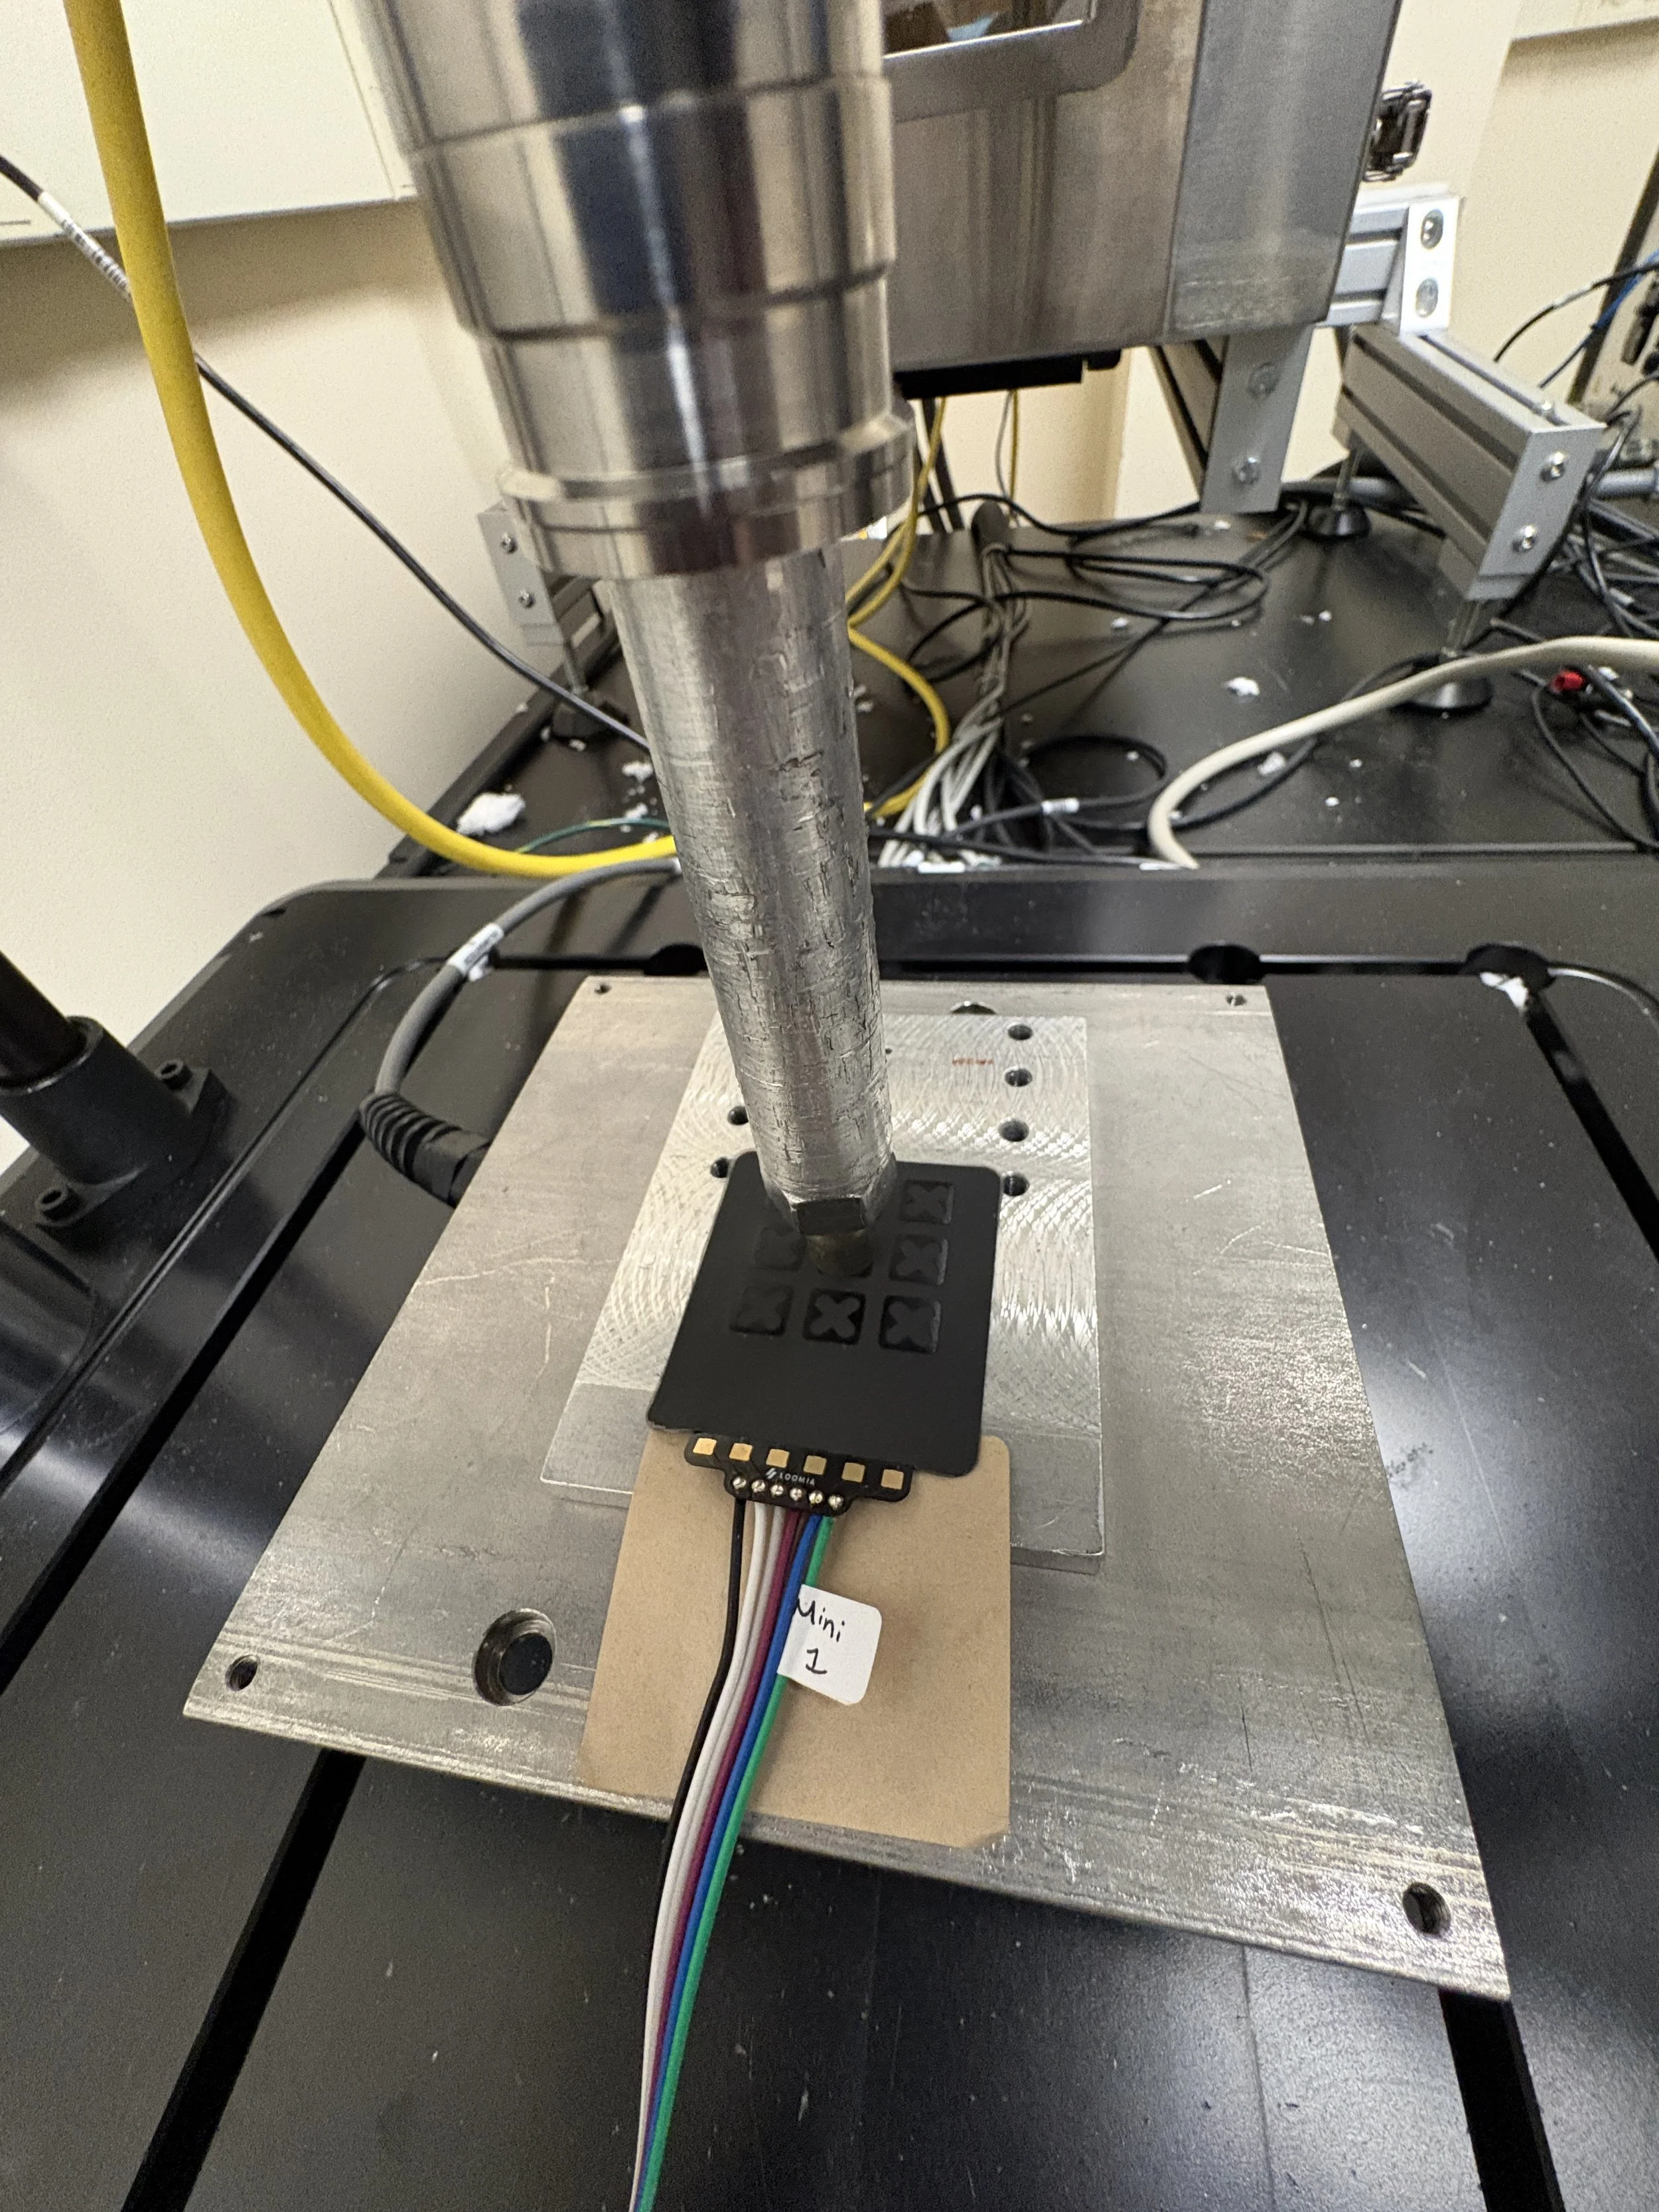
| 4 | For more accurate testing, use static weights to evaluate the force response for these sensors. |
Additional Evaluation Notes
Resistor testing:
Test different resistor values to eliminate noise while keeping sensitivity
Sensor Backing
Removing the PSA backing and sticking the sensor to your surface can increase sensitivity
Multimeter vs Arduino testing:
Sensors can also be evaluated with a multimeter for easier setup
Software
Loomia has sample scripts available to help you evaluate sensors. All scripts are available on our sensor product pages at Loomia Samples Store. L
Visualization Software:
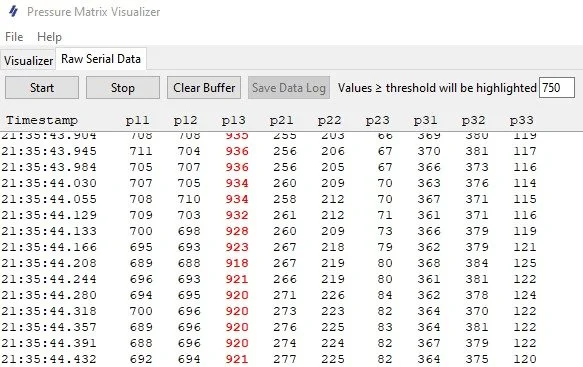
Loomia’s visualization software focuses on pressure matrix visualization. It allows for one-click validation and a serial-port view for easy data export. This visualization software is only available for Windows computers.
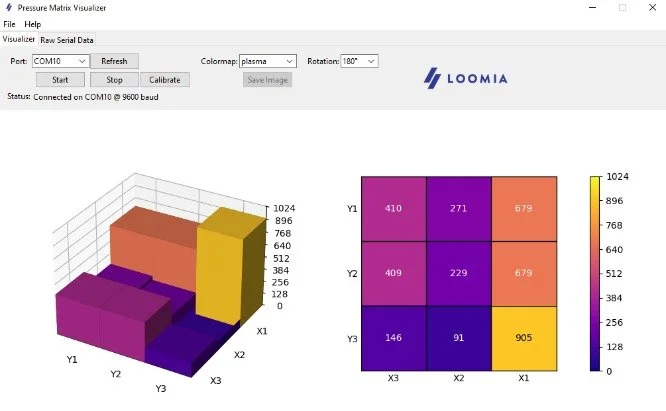
Software Matrix Visualization View
Software Raw Serial Data View
Featured Products
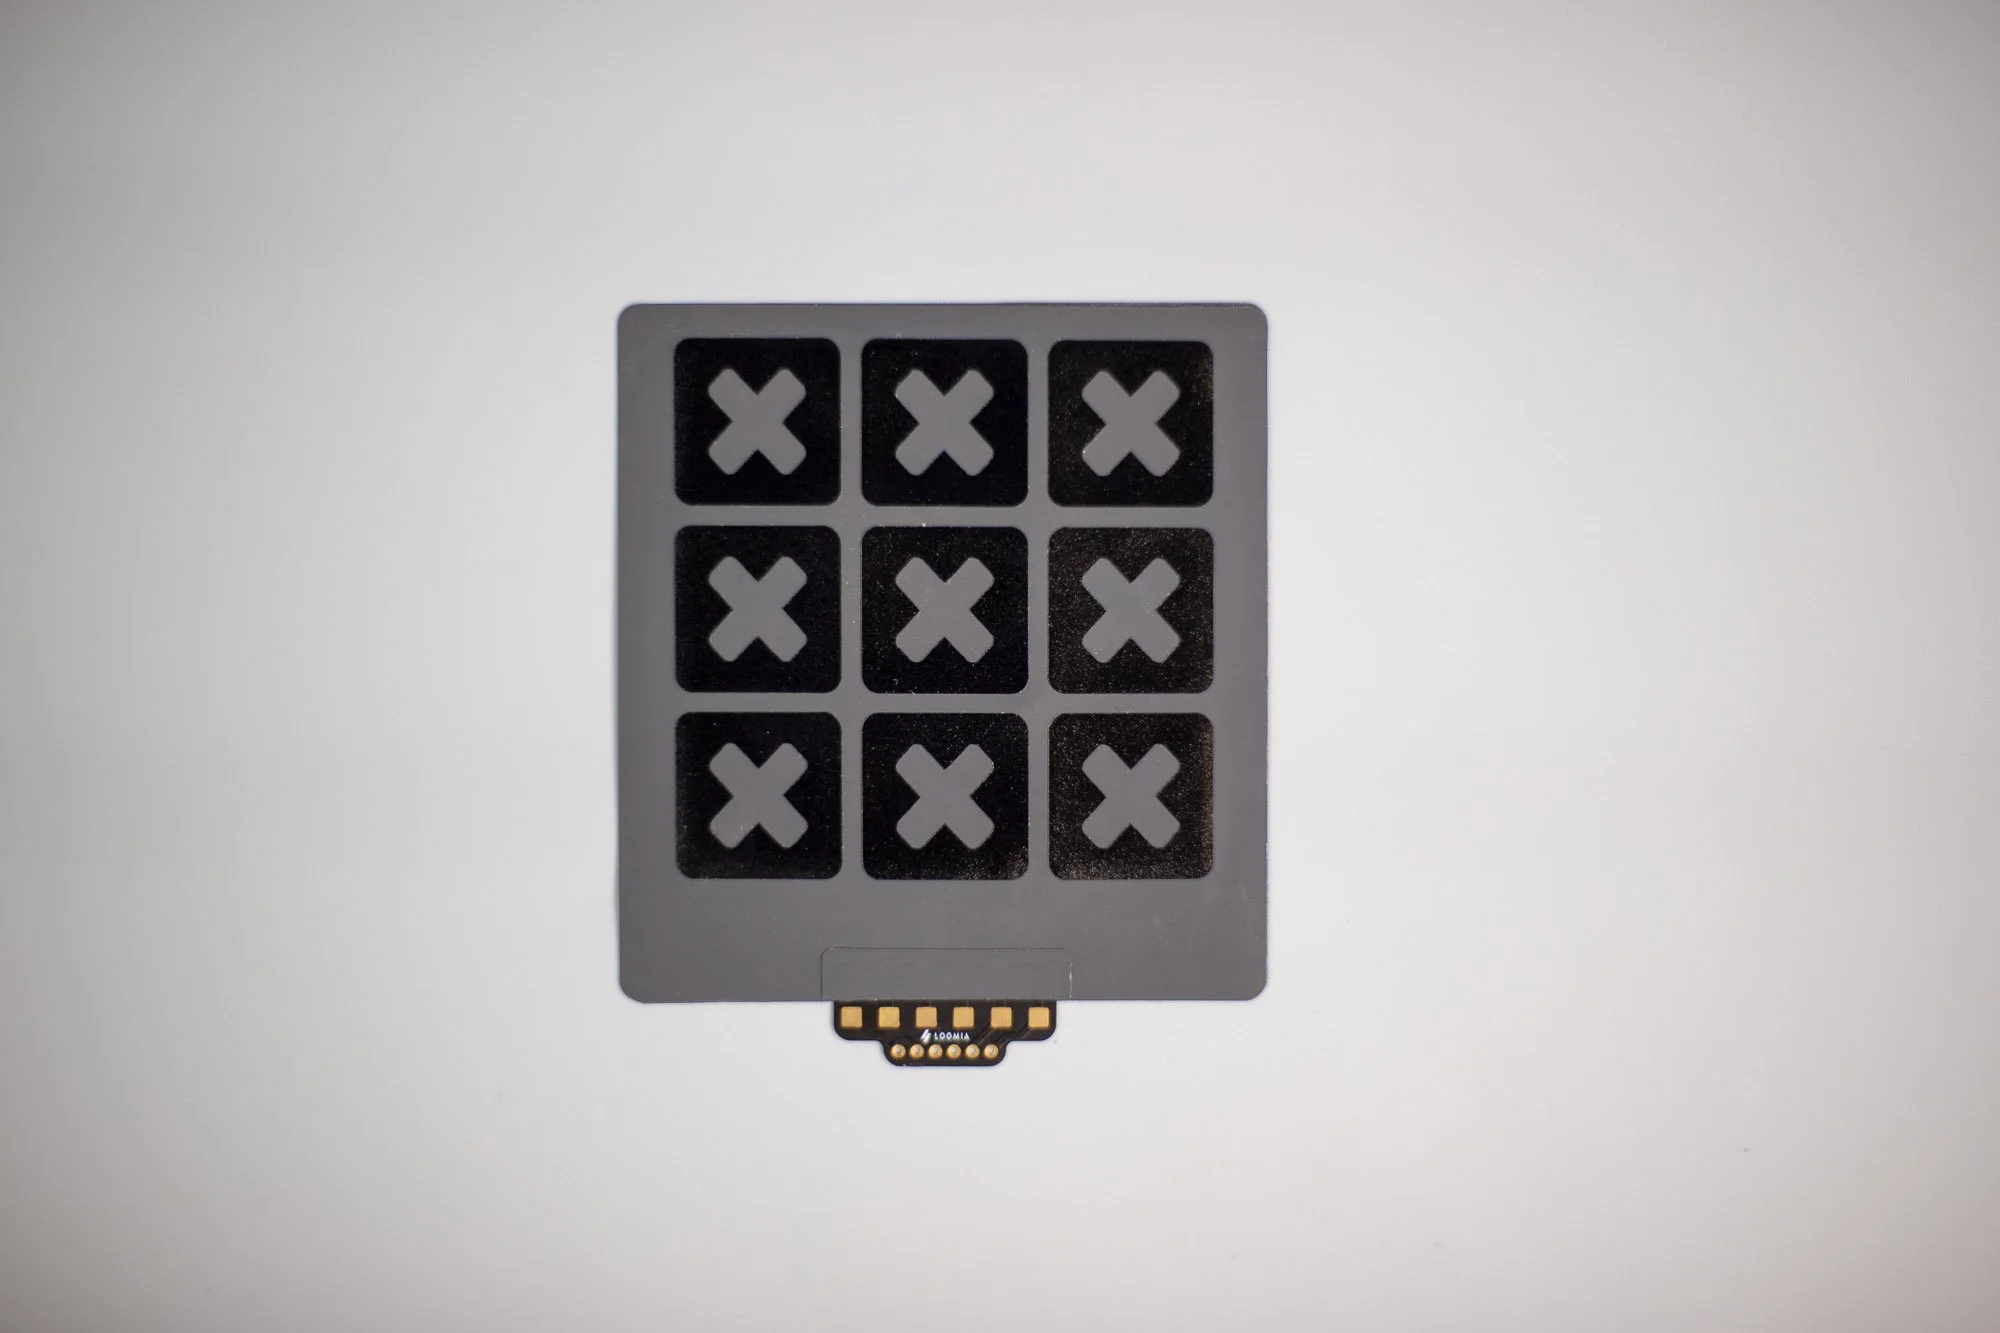
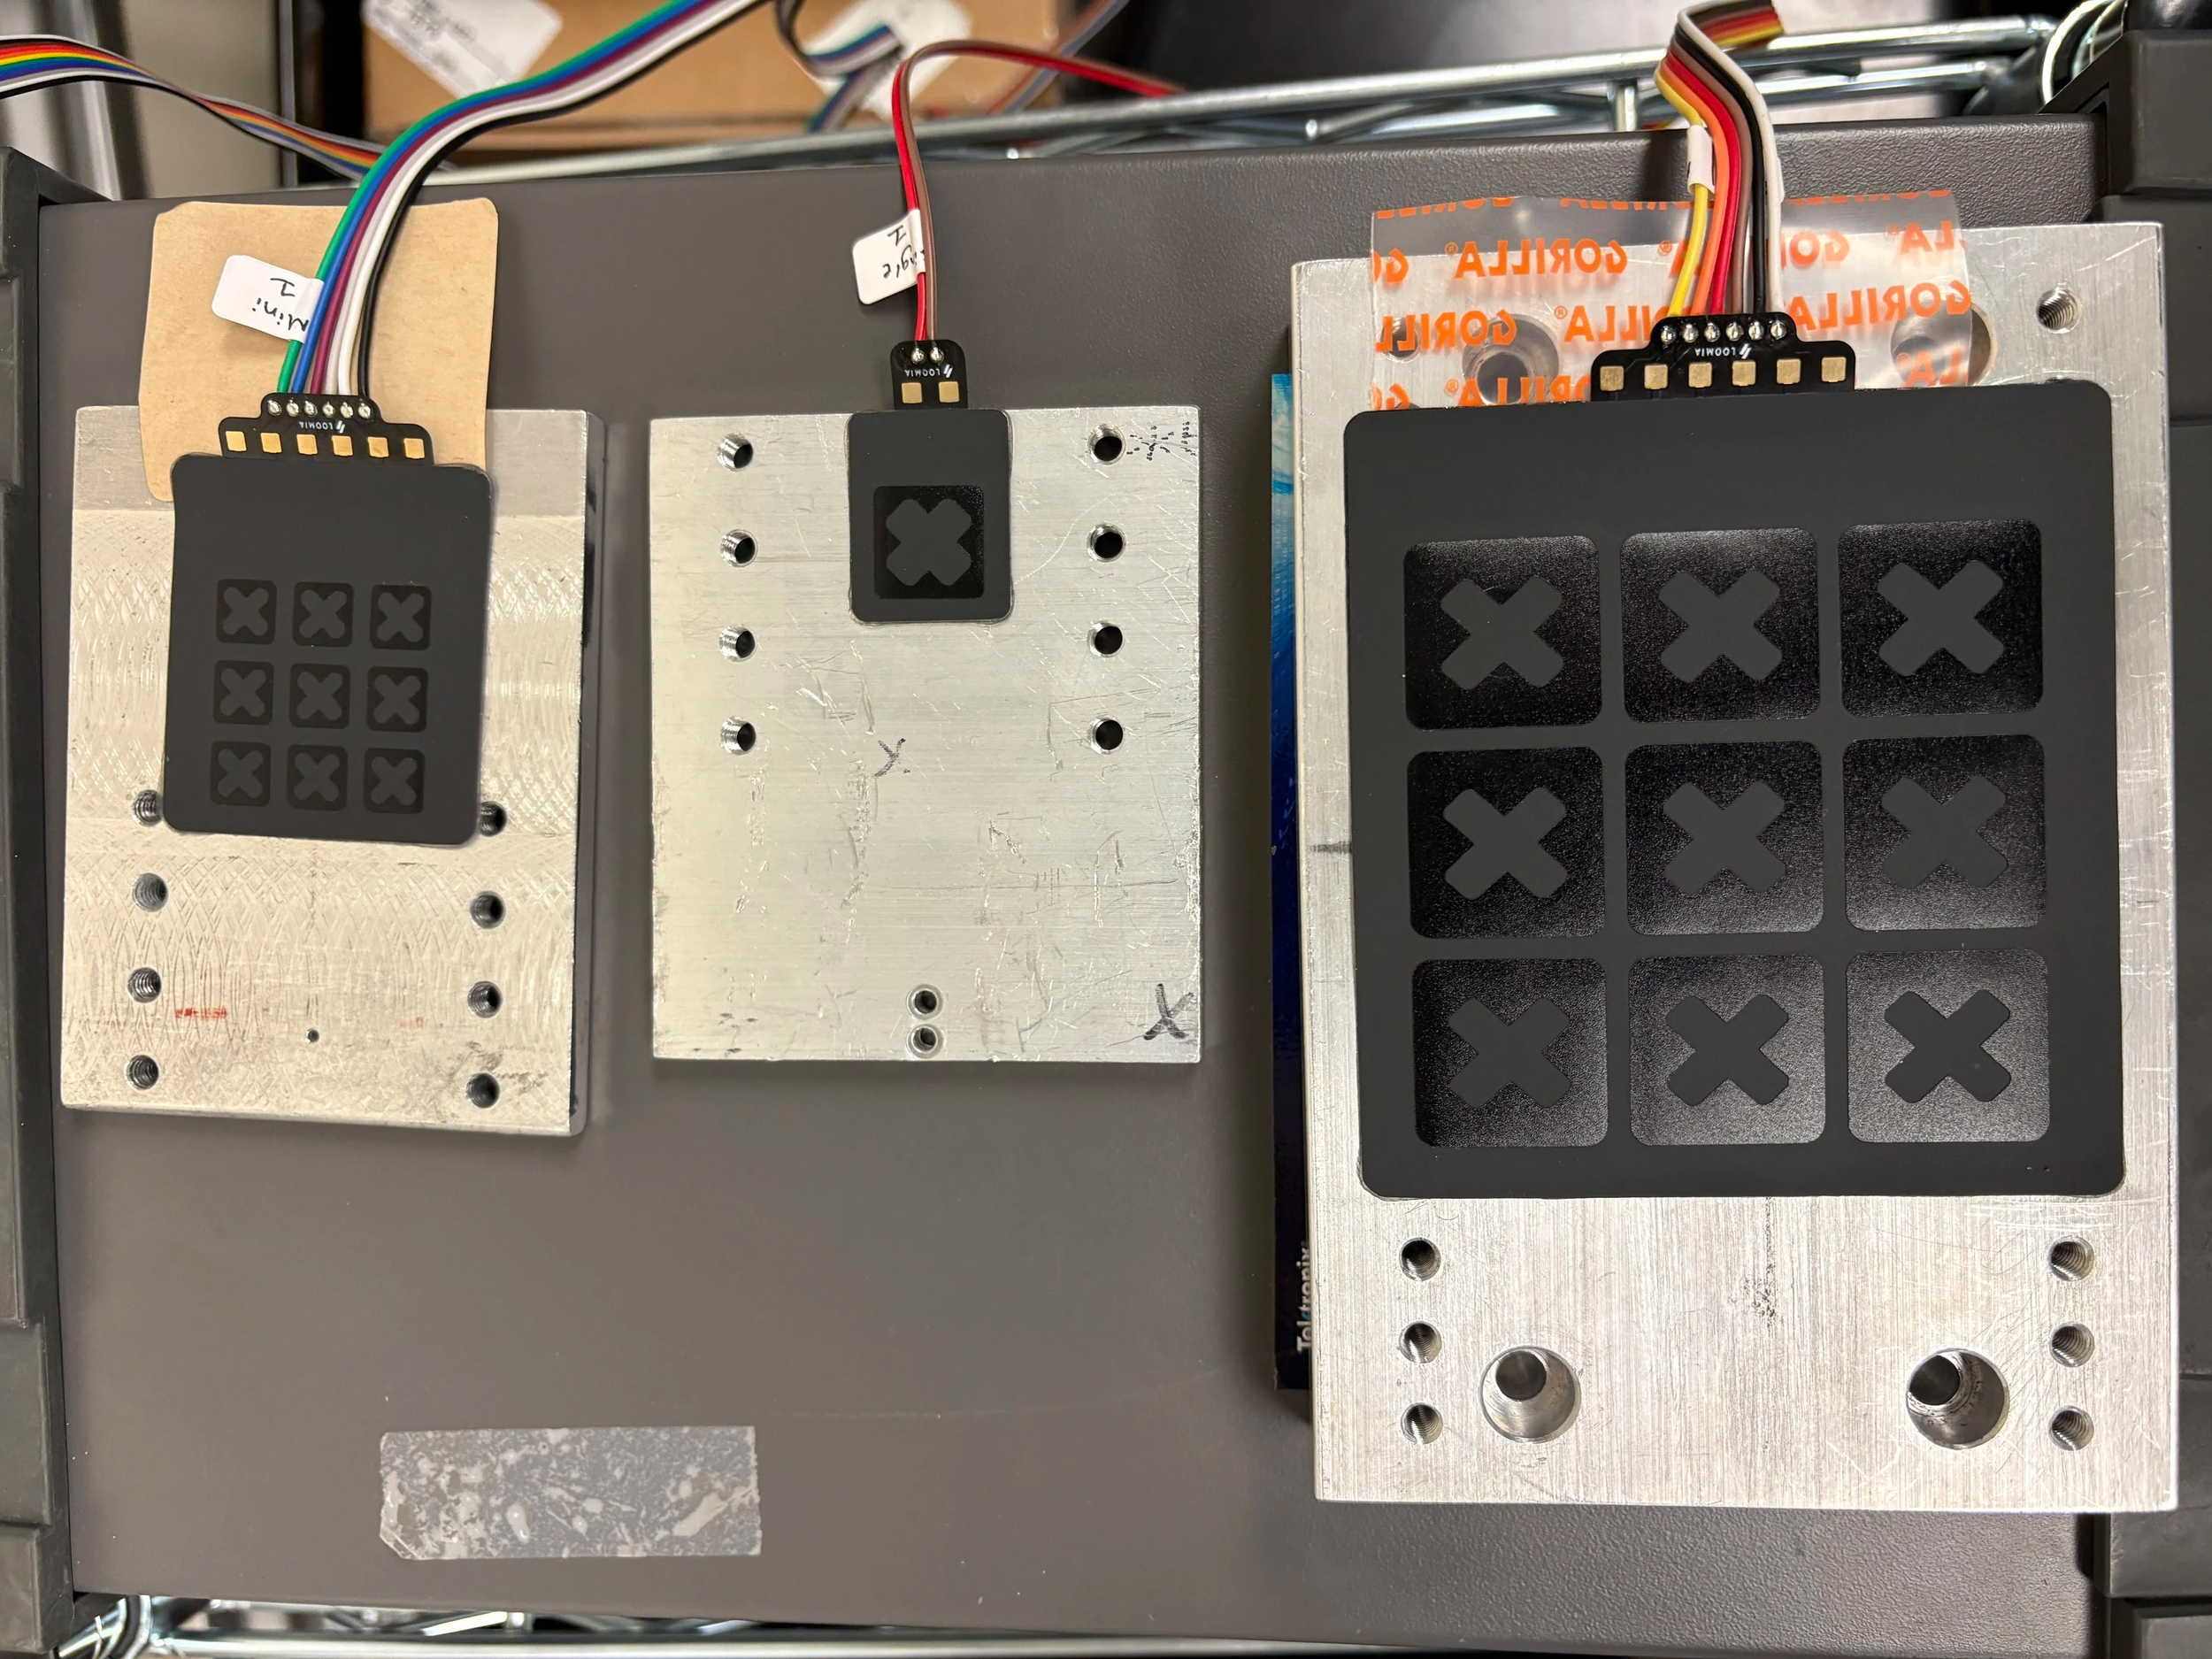
The Mega Matrix Force Sensitive Resistor (FSR) has 9 sensor cells in a 3×3 array. Each sensor cell is 22.8mm, and the overall component size is approximately 88mm x 95mm.
The Mega Matrix FSR gives you an analog read that maps the force on the sensor. The more you press, the lower the resistance goes. This component:
Can integrate with a PSA for quick and easy integration
Easily customizable for a range of forces and pixel points.
Unique non-printed sensor has a large dynamic range and good sensitivity
Loomia FSR matrices and single sensors are best for flat or slightly curved surfaces, but will work up to a bend radius of 8mm. These sensors can pack multiple points into a small area and can be customized to detect a range of forces by using masks.
Loomia has sample scripts available to help you evaluate sensors. All scripts can be found later on this page.
Resources:
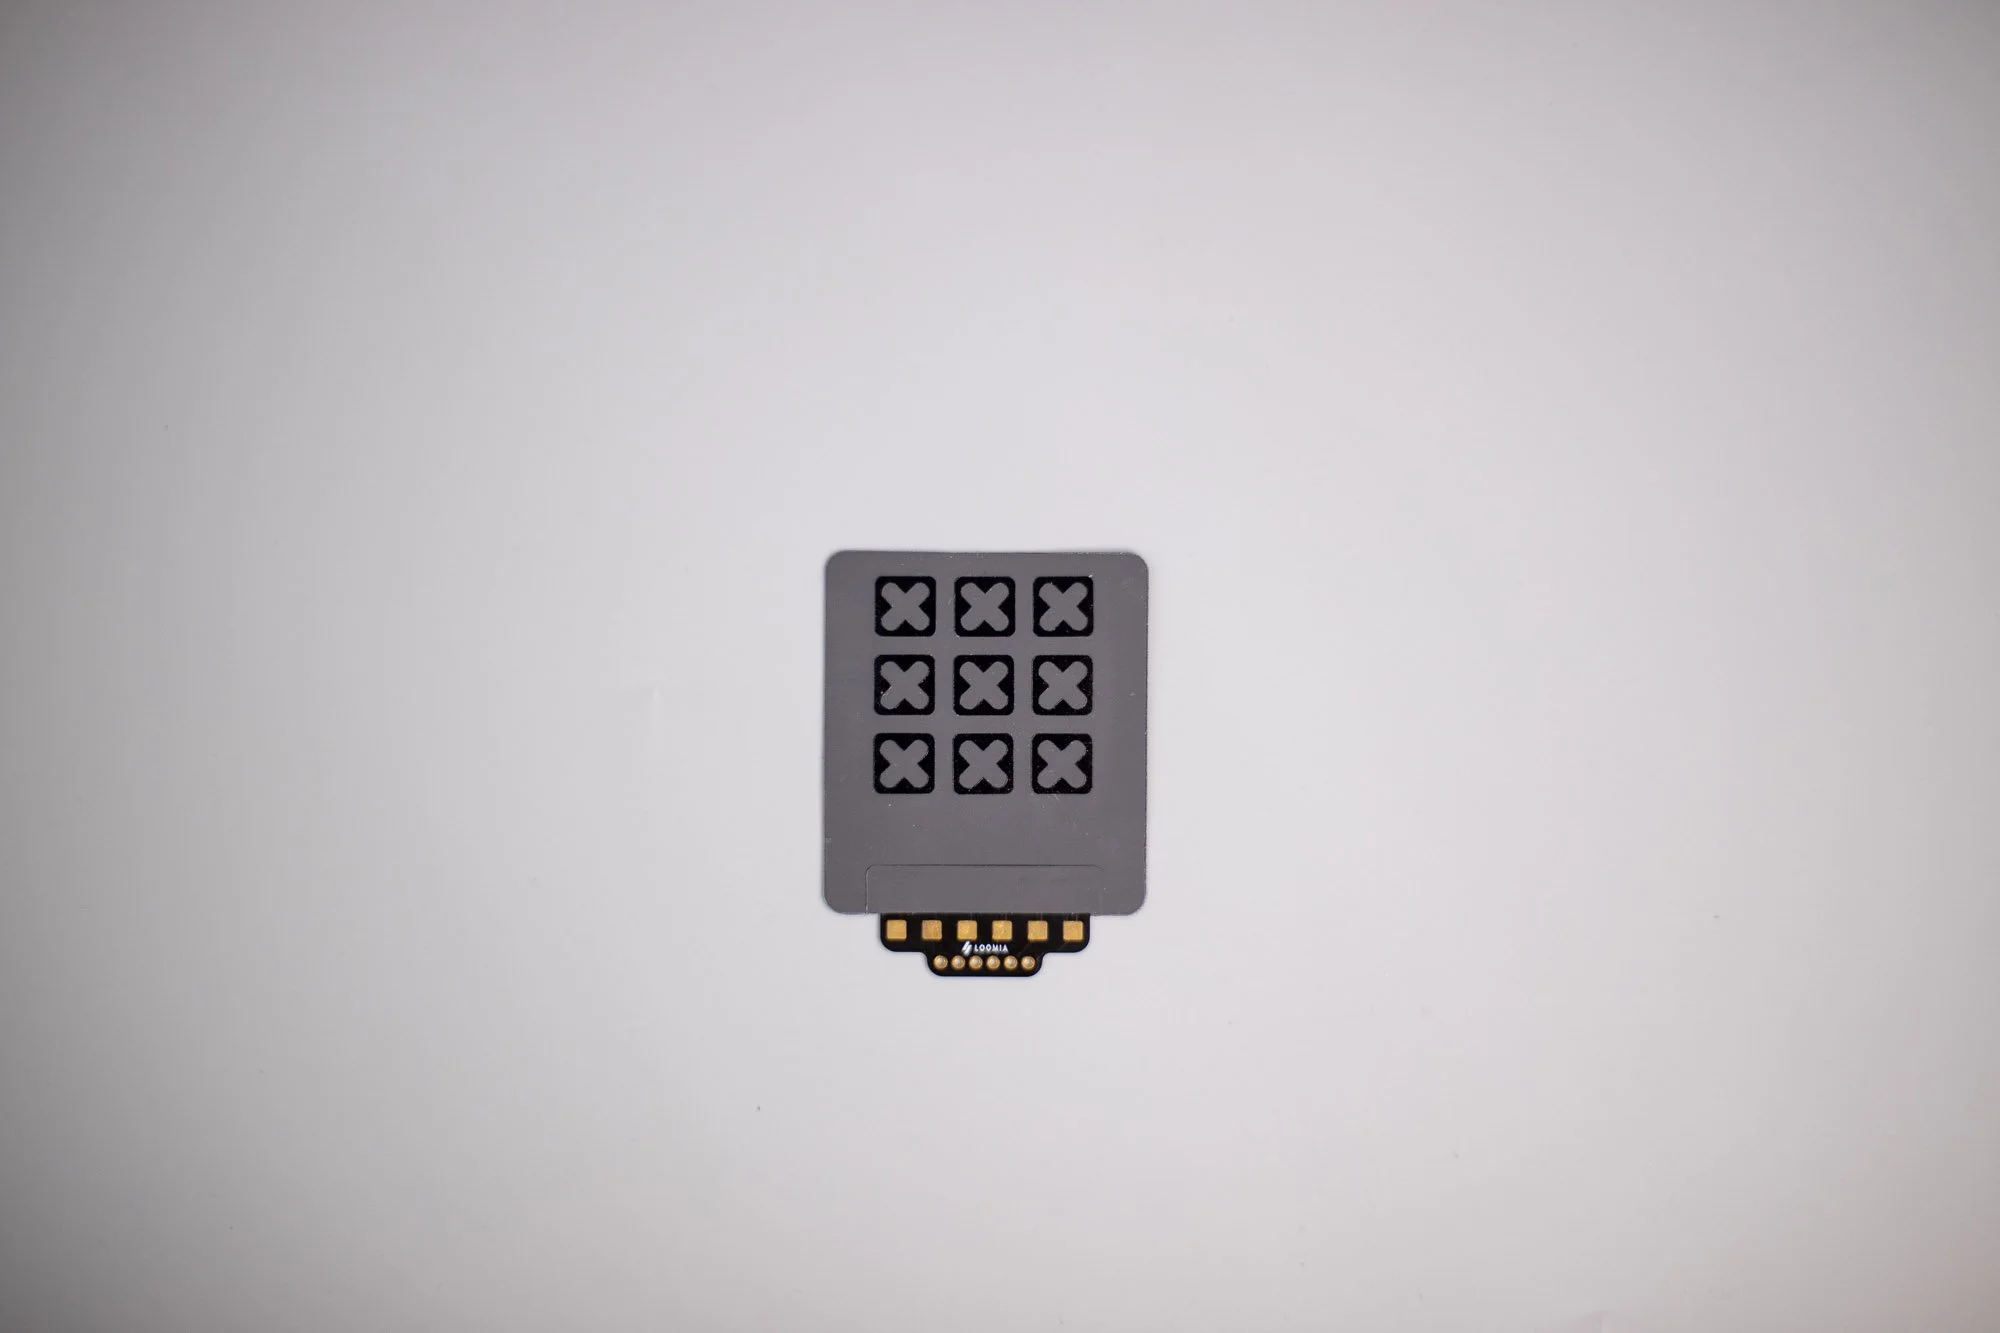
The Mini Matrix Force Sensitive Resistor (FSR) has 9 sensor cells in a 3×3 array. Each sensor cell is 8.9mm, and the overall component size is approximately 46mm x 53mm.
The Mini Matrix FSR gives you an analog read that maps the force on the sensor. The more you press, the lower the resistance goes. This component:
Can integrate with a PSA for quick and easy integration
Easily customizable for a range of forces and pixel points.
Unique non-printed sensor has a large dynamic range and good sensitivity
Loomia FSR matrices and single sensors are best for flat or slightly curved surfaces, but will work up to a bend radius of 8mm. These sensors can pack multiple points into a small area and can be customized to detect a range of forces by using masks.
Loomia has sample scripts available to help you evaluate sensors. All scripts can be found later on this page.
Resources:
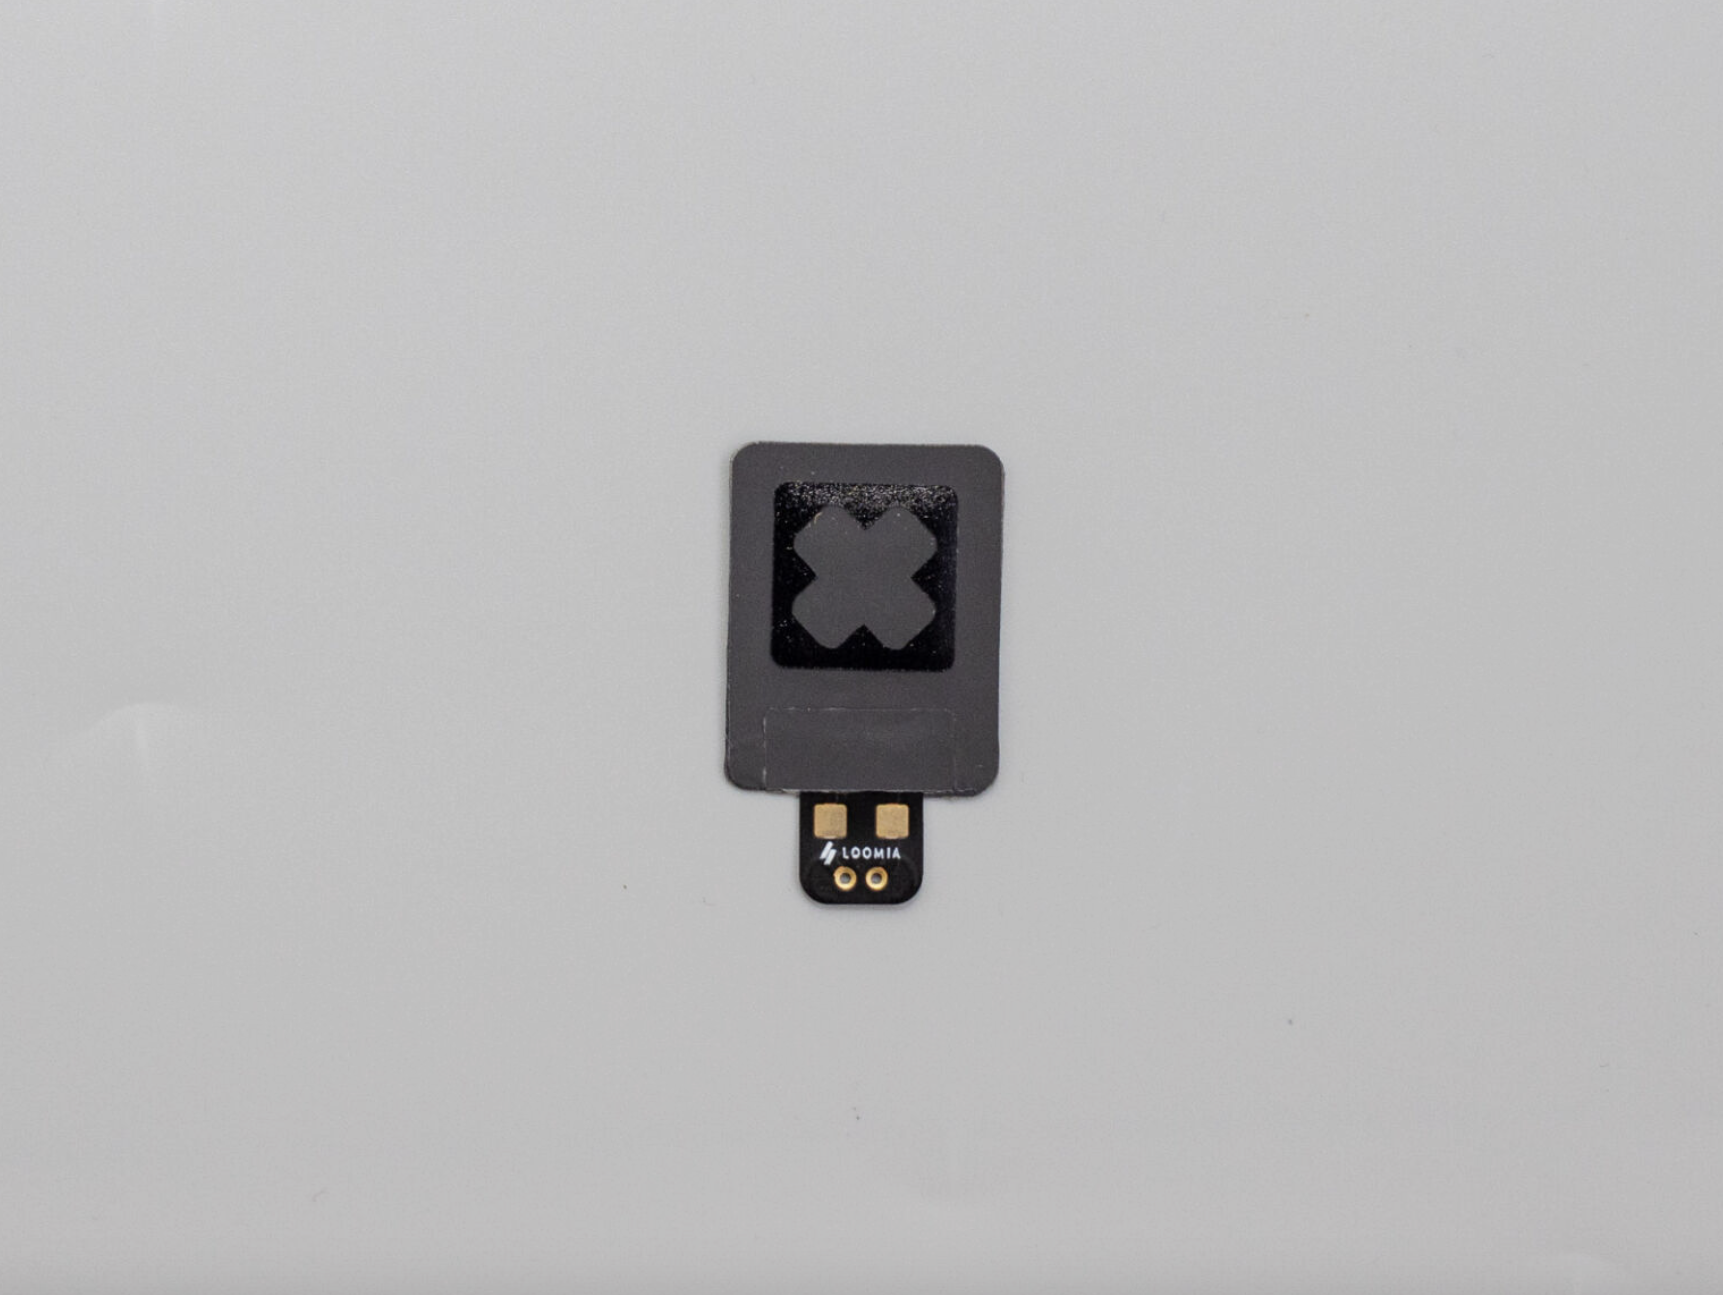
The Single FSR is a compact force sensitive resistor measuring approximately 22.2 mm × 28.6 mm.
The Single FSR gives you an analog read that maps the force on the sensor. The more you press, the lower the resistance goes. This sensor is small but mighty, making it convenient for small surface area applications.
Can integrate with a PSA for quick and easy integration
Easily customizable for different applications.
Unique non-printed sensor has a large dynamic range and good sensitivity
Loomia FSR matrices and single sensors can be used on flat or curved surfaces. These sensors can pack multiple points into a small area and can be customized to detect a range of forces by using masks.
Loomia has sample scripts available to help you evaluate sensors. Scroll down for pinouts and Arduino samples.
Resources:
Testing Loomia FSRs - FAQ
-
To validate your sensor setup, you will need:
A computer with Arduino installed
An Arduino board
A breadboard
A Loomia pressure matrix or single FSR
680 ohm resistors
Breadboarding jumper wires
Alligator clips (optional)
-
Use the example schematics to set up the sensor with pull-down resistors. The sensor can be connected to an Arduino using alligator clips or soldered connections.
-
After uploading the example code and opening the Serial Monitor, press each quadrant individually. The output should correspond to the correct row and column (R1C1 through R3C3). Values should increase as more force is applied.
-
For more precise validation, use static weights to evaluate the force response of the sensor instead of relying only on finger pressure.
-
You can test different resistor values to balance sensitivity and noise reduction during evaluation.
-
Yes. The sensors can also be evaluated using a multimeter for a simpler setup during initial testing.
For other questions, contact our team at Loomia.